[vivado]SDK那些事儿——初试
0赞前言:
笔者在cuter的一步步指导之下,完成的。虽然字是笔者自己码的。但是基本每一个步骤都是在cuter的帮助下完成的。所以如果,您读了这篇文章,觉得有帮助。那么请将票投给cuter。
http://blog.chinaaet.com/detail/35978
拜读了cuter的《基于Vivado的嵌入式开发——PS走起》文章之后,跟着cuter的步骤走到了最后一步:导出硬件,转战SDK。
结果在这里卡住了。SDK打不开。发现原来SDK我还没安装,于是乎,找到以前的安装包,把SDK程序选上。
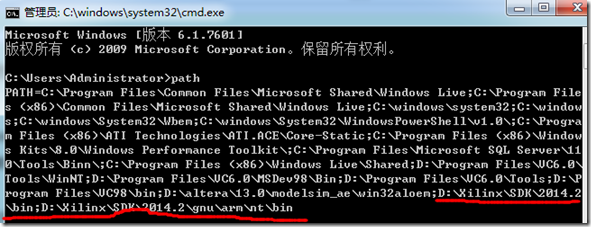
结果,依然无法通过Launch sdk打开。后得知是环境变量的设置问题(在运行中,输入cmd,再输入path,可查看环境变量是否加入)
这是我设置好的之后,添加进去的结果。
接下来,我们看看,环境变量到底是如何设置的(我是win7,xp的基本一样,win8的没搞过)
1、右击我的电脑,选择属性:
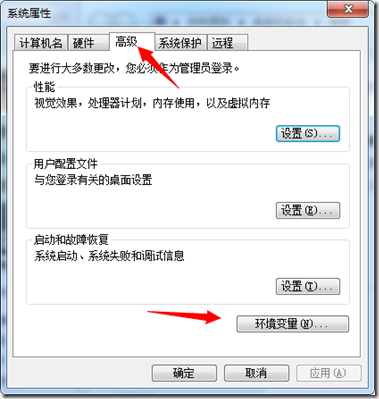
2、选择高级系统设置:
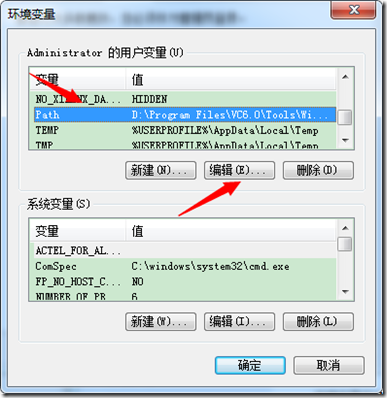
3、选择环境变量:
4、选择Path并且选择编辑,并且添加下面这两句:
;D:\Xilinx\SDK\2014.2\bin
;D:\Xilinx\SDK\2014.2\gnu\arm\nt\bin
这个是我SDK的安装路径,你需根据自己的安装路径进行修改。
修改完毕之后,环境变量就已经设置好了,再次点击Launch sdk,
就能打开SDK环境了。
//------------------------------------------华丽分割线------------------------------------------
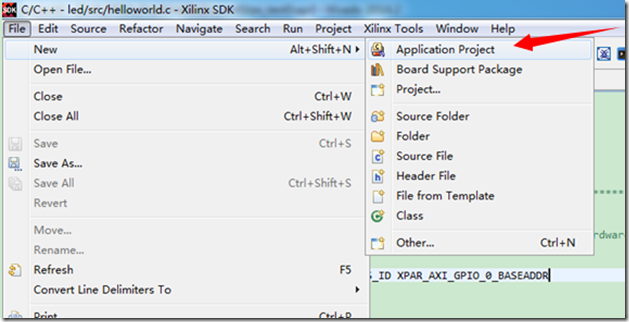
下一个插曲,sdk打开之后,我们直接新建一个Hellow World 工程,并且用cuter的代码去替换,即可:
为了方便读者,就把cuter的代码贴在这里:
#include <stdio.h>
#include "platform.h"
#include "xparameters.h"
#include "xgpio.h"
#include "sleep.h"


/************************** Constant Definitions *****************************/

/*
 * The following constant maps to the name of the hardware instances that
 * were created in the EDK XPS system.
 */
#define XPAR_LEDS_ID XPAR_AXI_GPIO_0_BASEADDR


/*
 * The following constant is used to determine which channel of the GPIO is
 * used for the LED if there are 2 channels supported.
 */
#define LED_CHANNEL 1

/************************** Variable Definitions *****************************/

/*
 * The following are declared globally so they are zeroed and so they are
 * easily accessible from a debugger
 */

XGpio Gpio; /* The Instance of the GPIO Driver */

int main()
{
    init_platform();
    u8 i=0;
    int Status;

    /*
    \ Initialize the GPIO driver
    */
    Status = XGpio_Initialize(&Gpio, XPAR_LEDS_ID);
    if (Status != XST_SUCCESS) {
        return XST_FAILURE;
    }

    /*
    \ Set the direction for all signals to be outputs
    */
    XGpio_SetDataDirection(&Gpio, LED_CHANNEL, 0x00);

    /*
    \ Loop forever run the LED
    */
    while(1)
    {
        for(i=0;i<8;i++)
        {
            XGpio_DiscreteWrite(&Gpio, LED_CHANNEL, (1<<i));
            sleep(1);
        }
    }

    return 0;
}
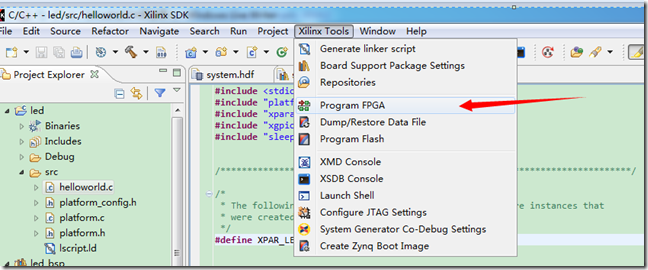
新建好了软件之后,我们别忘了还需要先对FPGA进行编程:
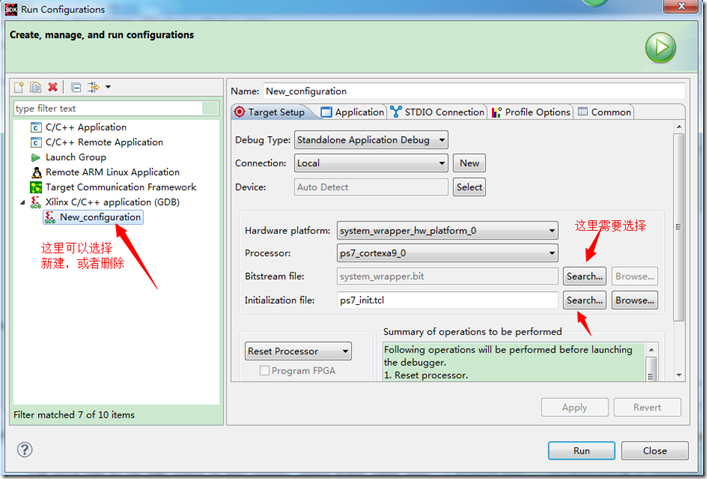
然后,选择如下:(我们要去这里面做一个设置)
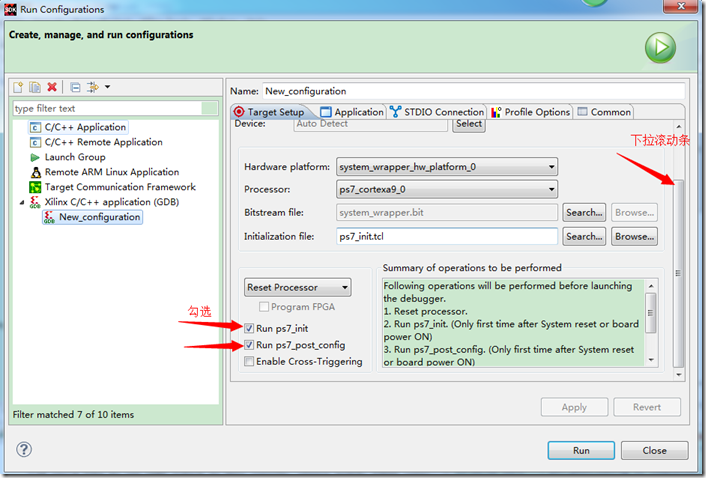
依然是,这个界面,我们下拉滚动条,勾选两个东东:
切换到Application选项卡:
好了,流水灯终于开始缓慢的运行了~~~再次感谢热心的cuter哥哥~~
技术讨论欢迎加群~~电子技术协会 362584474 cuter哥也在喔~~
